
BIGQUERY LINKING
Get lightning fast access to your raw analytics data!

Not everyone will want to integrate with BigQuery, but for many this is one of the biggest features and selling points of GA4. If you are an enterprise Analytics user paying $150k per year for GA360, you will be delighted that this feature is now being offered free with GA4. However, for those who have never had access to this feature and don’t know if they need it or not, this lesson will tell you all you need to know.
It’s important to know from the outset that the setup for BigQuery is not easy, plus you will have to know how to write SQL statements and have an in-depth understanding of the GA4 data structure in order to use it. Bear this in mind when looking at the benefits to decide whether it’s worth the time investment for you.
If you decide you do want to use BigQuery, now is a good time to set it up so you can start collecting data as soon as possible and improve your future analysis.
How to Connect to BigQuery
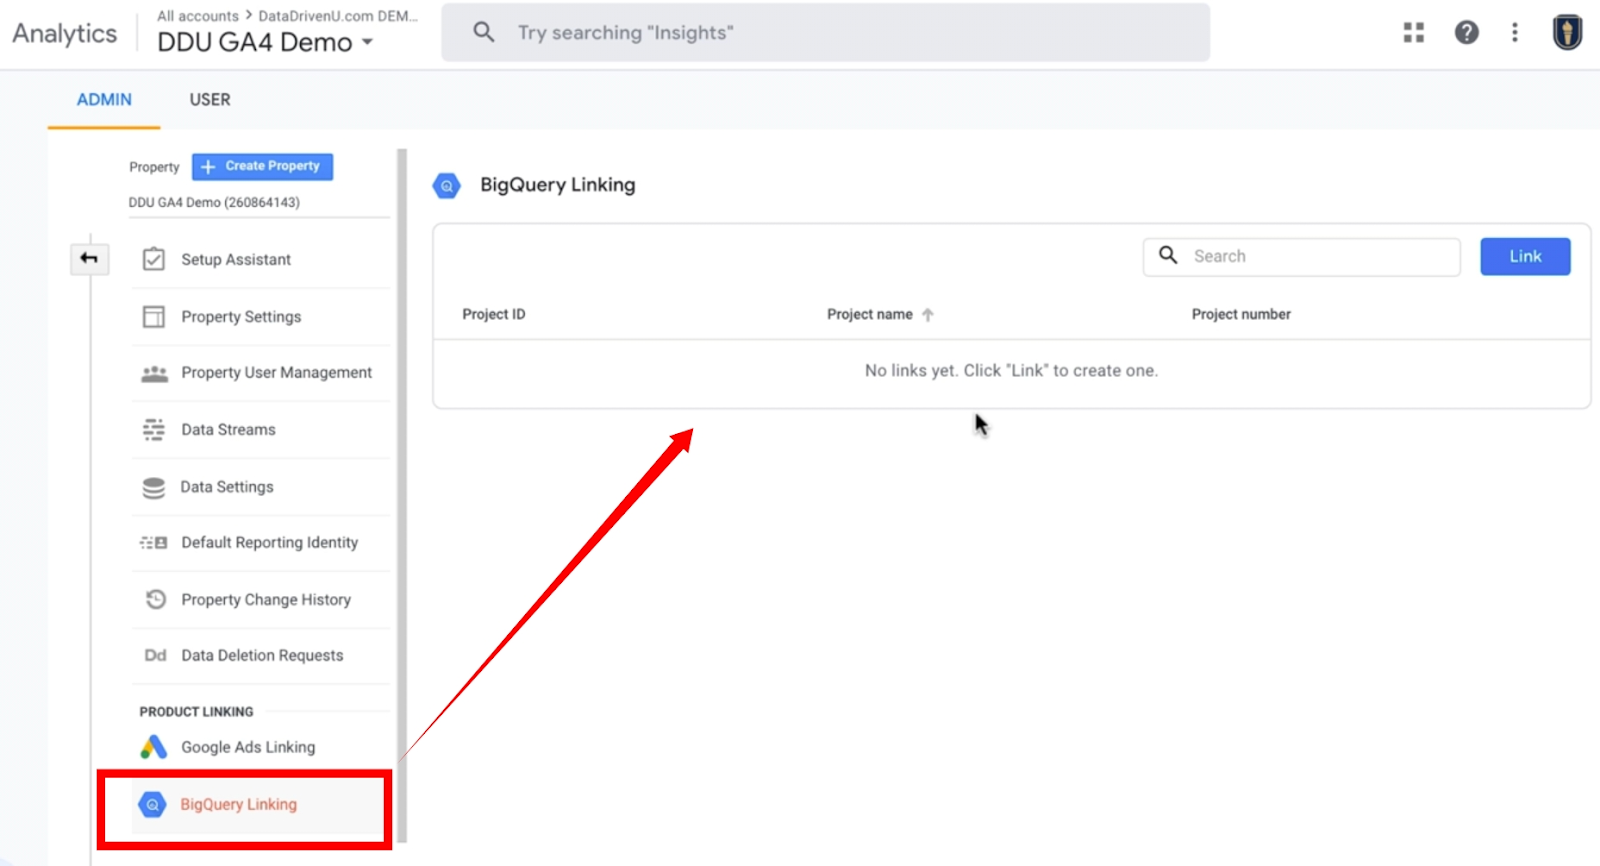
Go into your GA4 account and in the linking section click on BigQuery Linking. This won’t be populated with any data just yet.
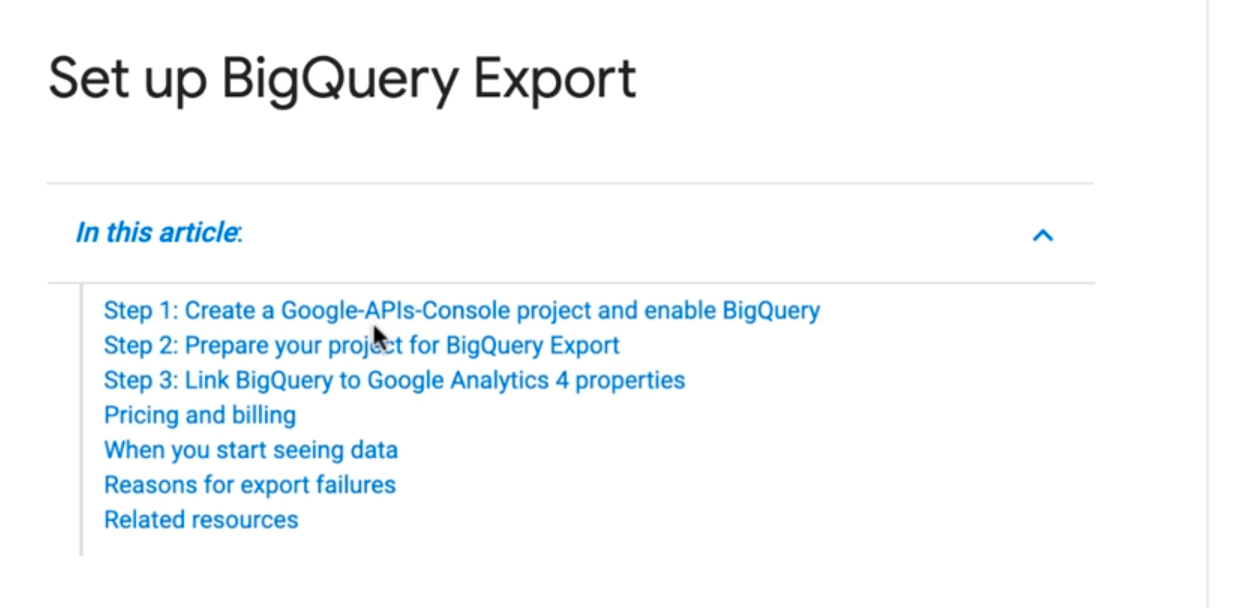
Next, on the Link Setup page, click the Learn more link.

This link will take you to a set up article in Google support which will guide you step-by-step through the process.
Step 1: Create a Google APIs Console project and enable BigQuery
The first step is to set up a Google APIs Console project. The steps for this process are listed in the setup article. However, the steps in the article are quite basic and confusing in places, so we will go through them in more detail.
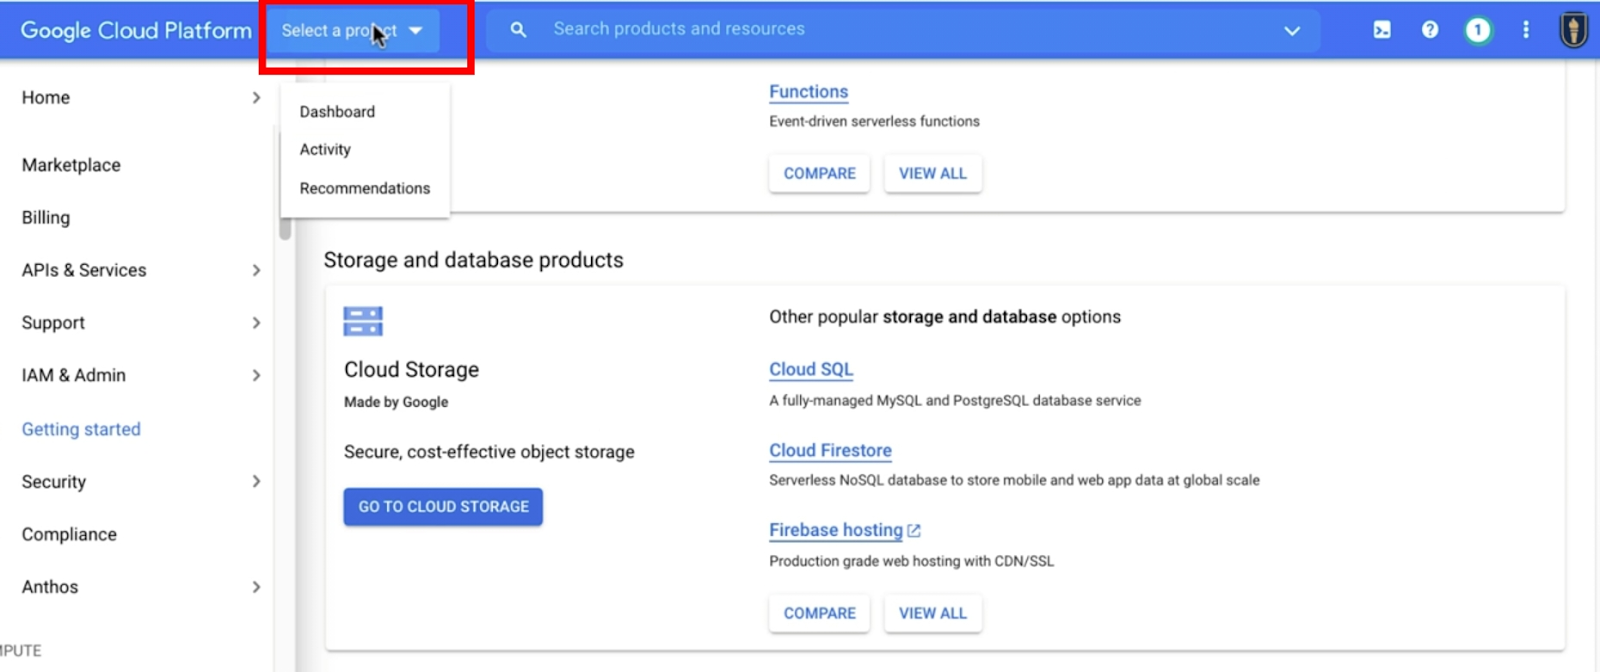
Log in to Google APIs Console and create a project
First, follow the link to the Google Cloud Platform. Then, click on the Select a Project button at the top left.
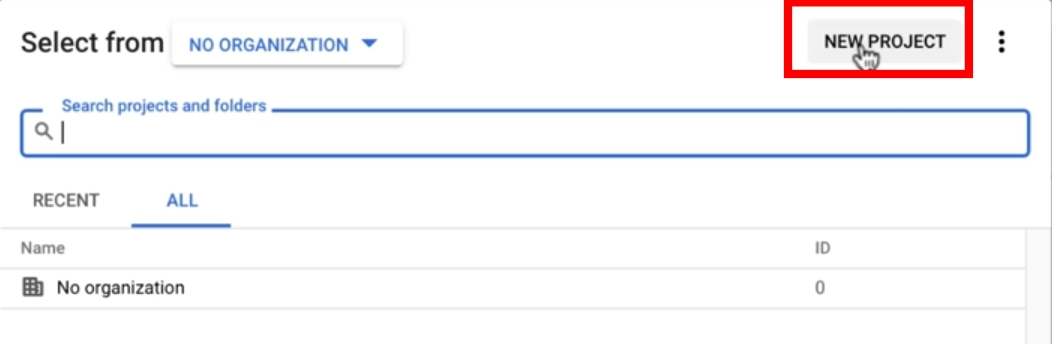
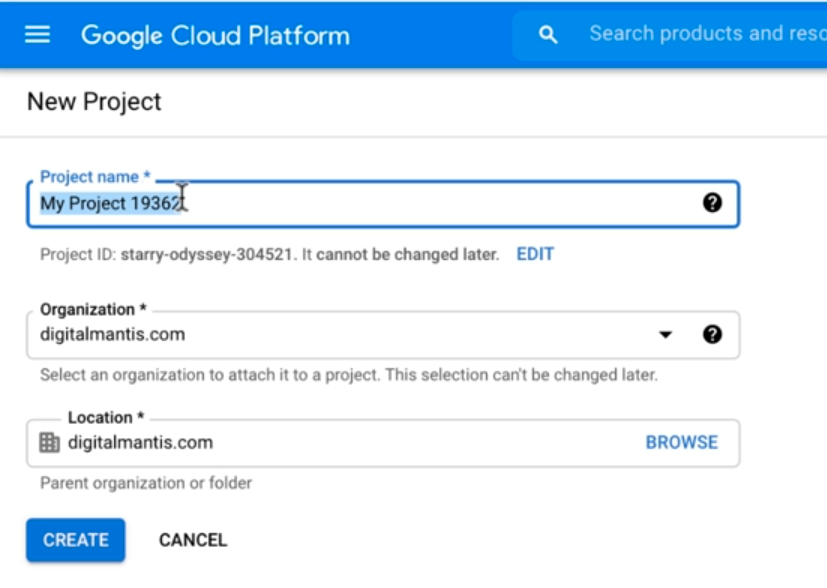
In the window that opens up, click the New Project button.
Add a project name along with your organization and location, and click Create.
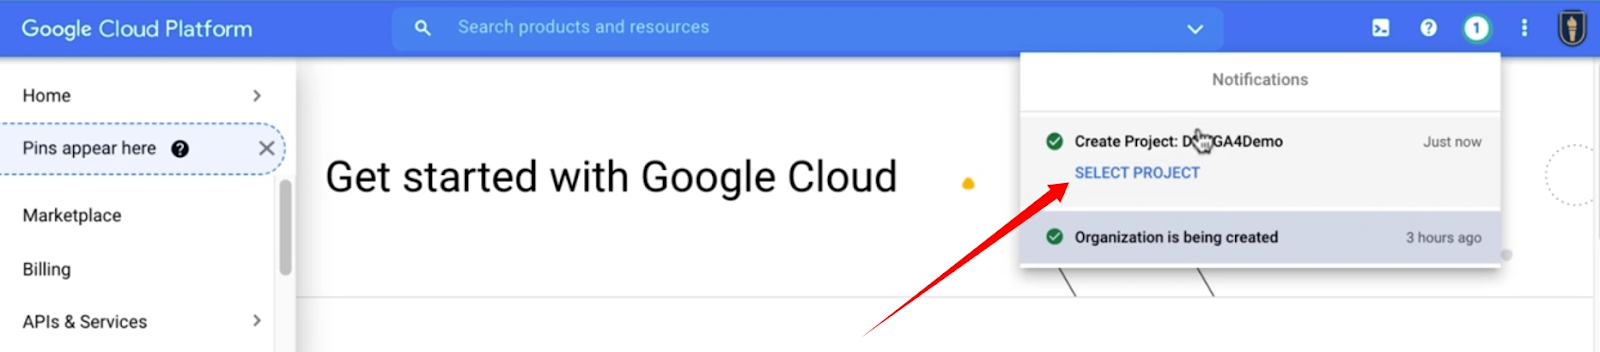
While your project is being created, you will see a notification. When it’s ready, you can select the project by clicking the link on the notification; Select Project.
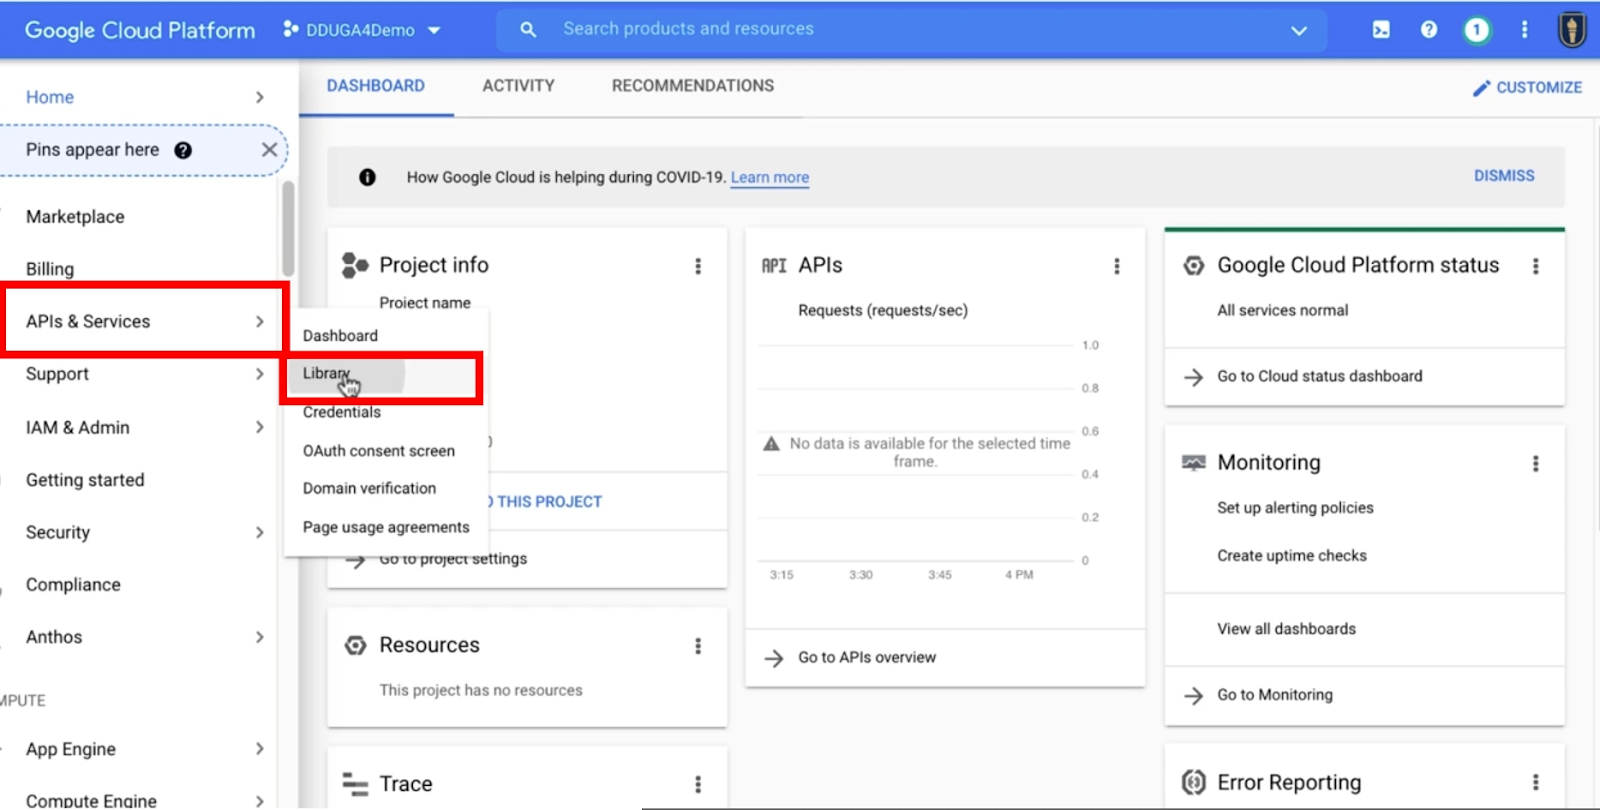
Navigate to the APIs table
With your project open, go to the side menu and select APIs and Services and choose Library from the sub-menu.
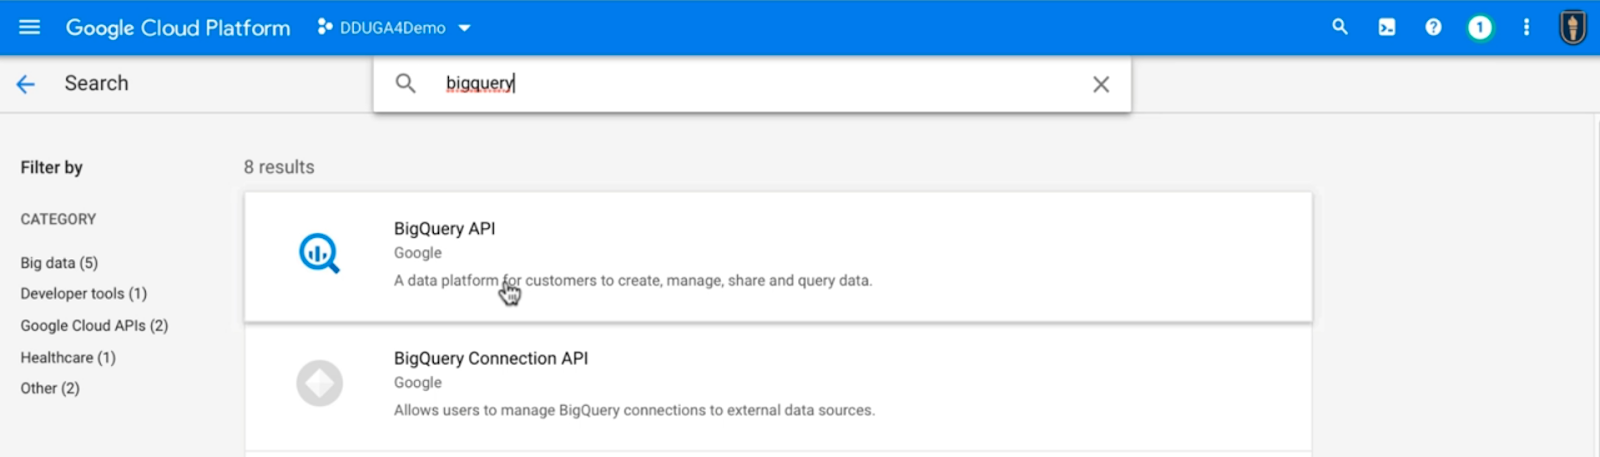
In the console library, search for BigQuery.
Activate BigQuery
The API should already be enabled, but you can verify that by checking that it has the gree check mark. Then, click the Manage button.

Add a service account to your Cloud project
This is where things get confusing in Google’s instructions. Select Credentials from the side menu and then, click the Manage service accounts link.
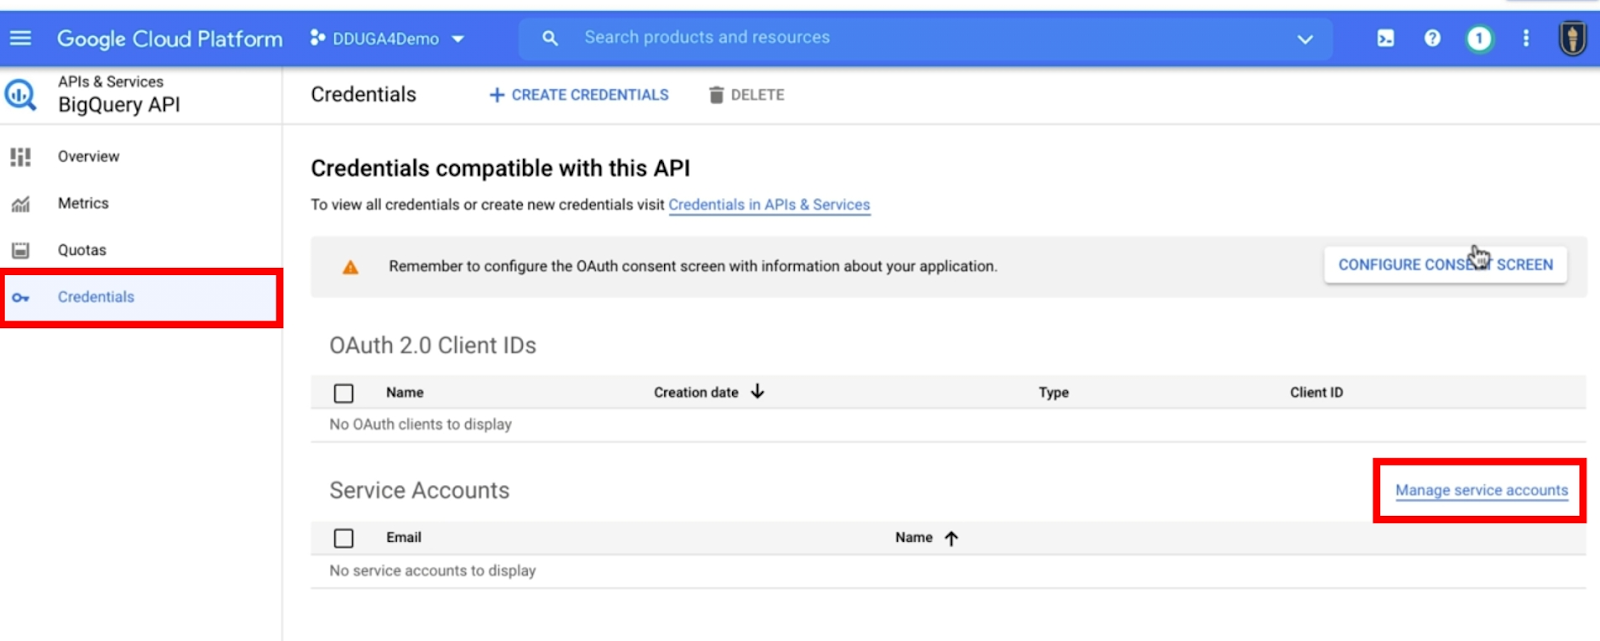
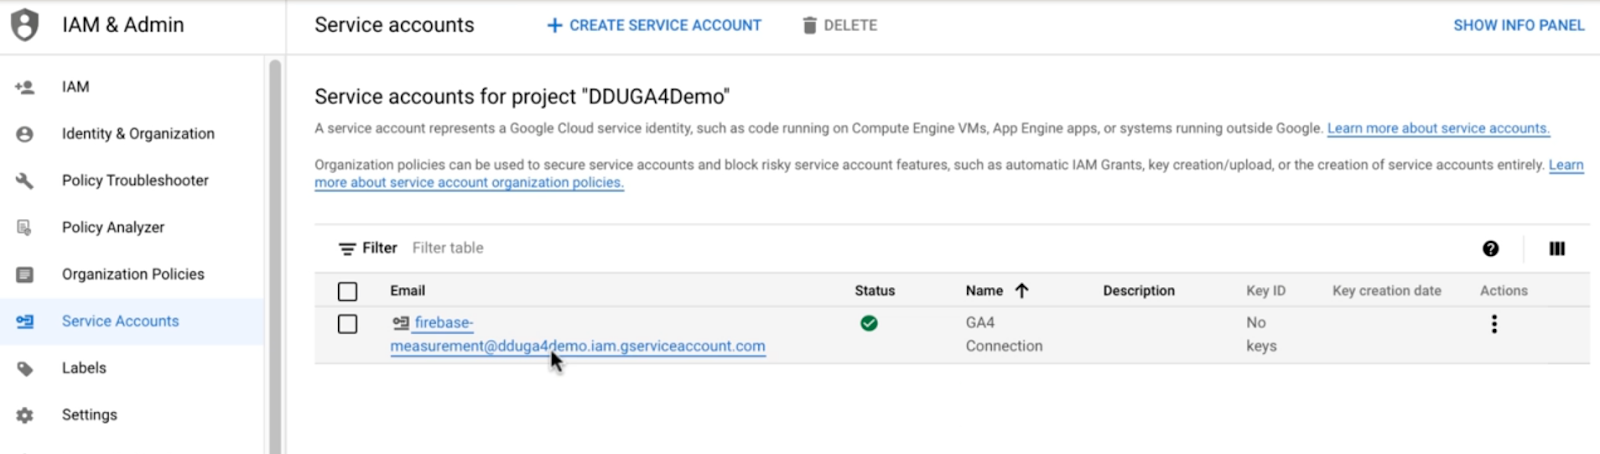
On the next screen, click Create Service Account at the top of the screen.
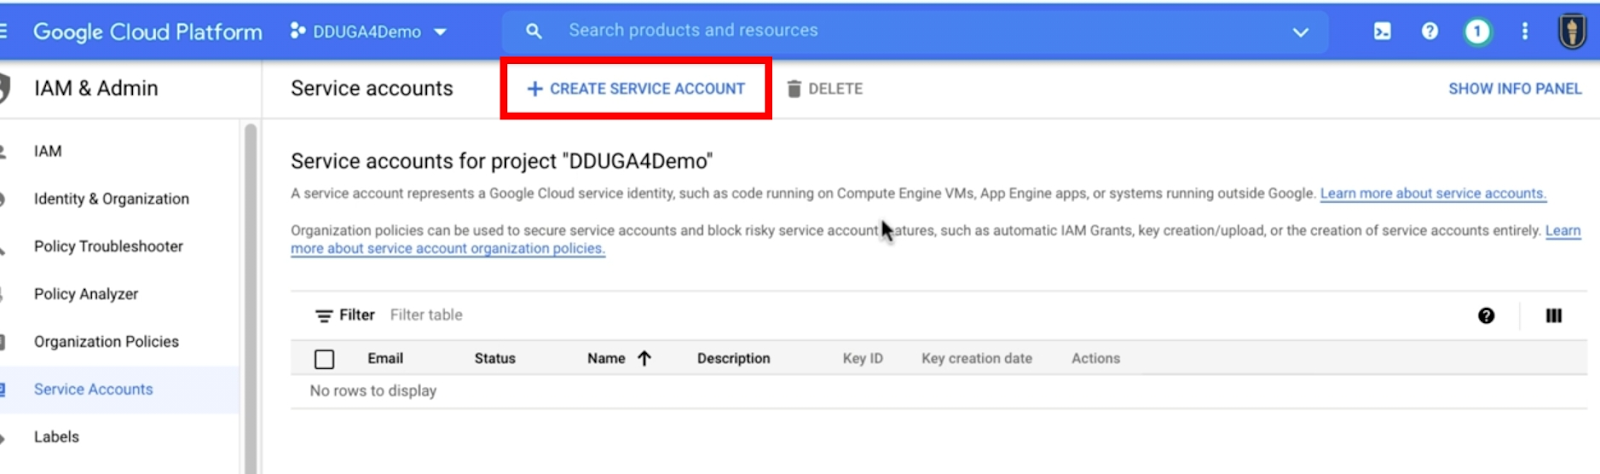
Give your service account a name and for the Service account ID you need to enter firebase-measurement (as indicated in the setup instructions). The rest of this field will be auto-populated with your account data.

Add a description if needed and click Create.
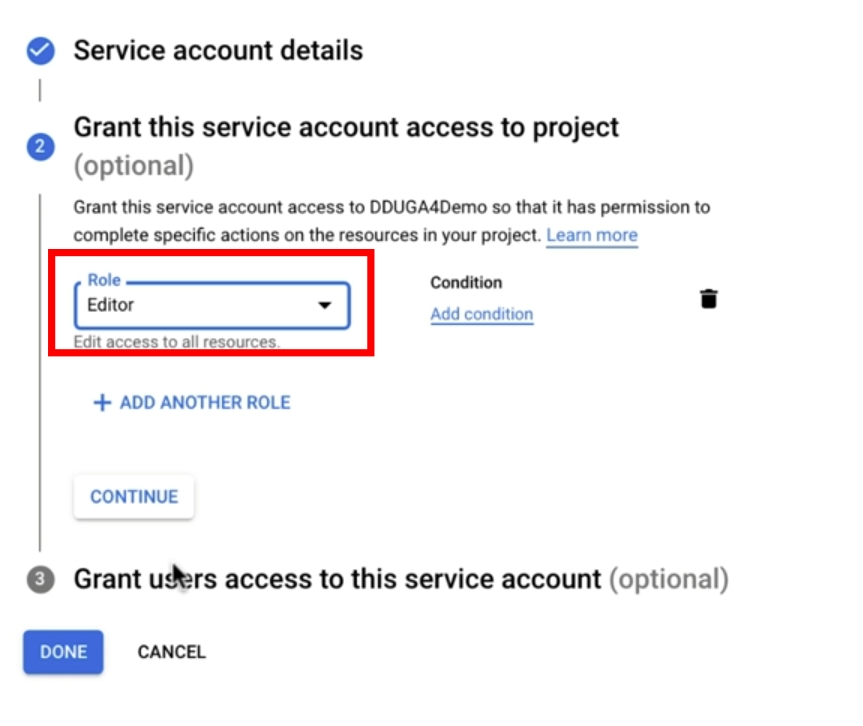
In step two, you can add a role to the account. Click the dropdown menu and select the role you would like to add by using the search field or by scrolling the options. For example, Editor.
In step three, add the email addresses of anyone who will be using or administrating the account.
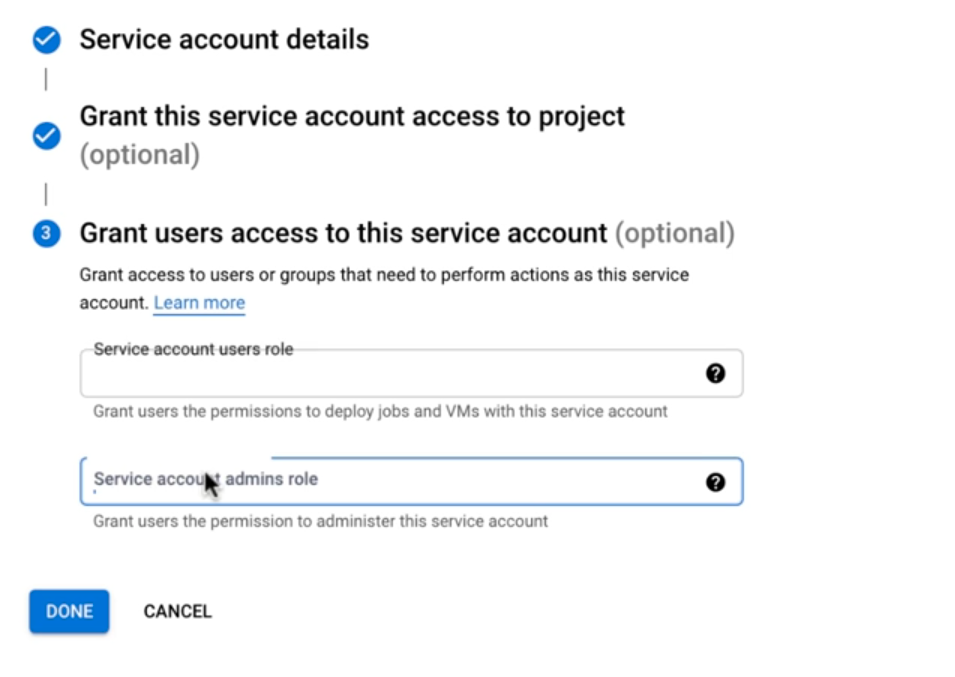
Click Done and you will see your new account listed on the Service Accounts page, although it will take a few hours before the data is populated.
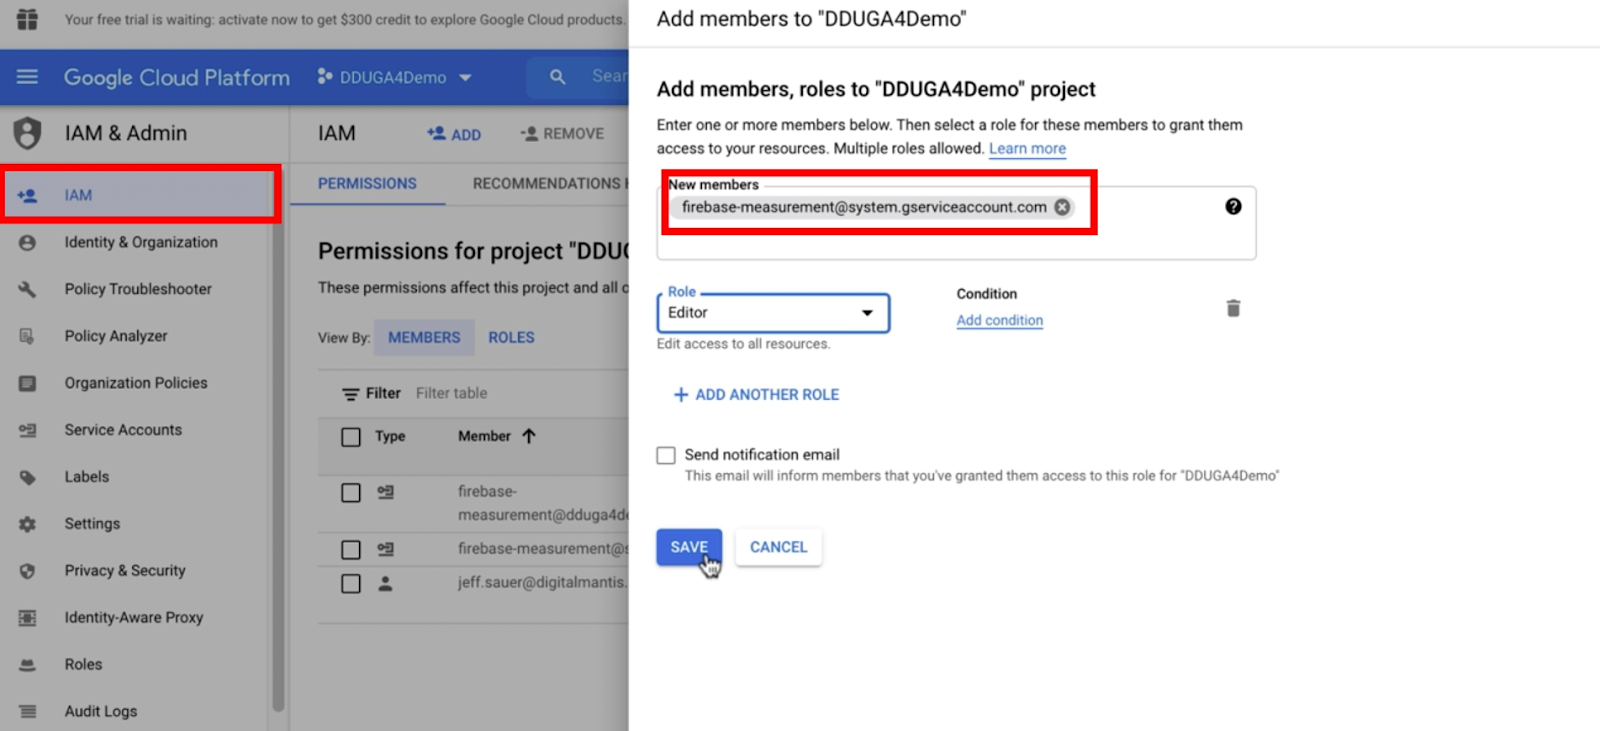
Adding a new member role
Adding the service account isn’t enough to make this work and something that is missing from Google’s instructions is adding a new member role.
On the Cloud Platform page, select IAM from the side menu. Select the Permissions tab and click the Add button to open an edit window where you can add members and roles.
In the new members field add the following address: firebase-measurement@system.gserviceaccount.com
For the role, select Editor and then Save.
Step 2: Prepare your project for BigQuery export
You are able to export Google Analytics data to the BigQuery sandbox at no charge.
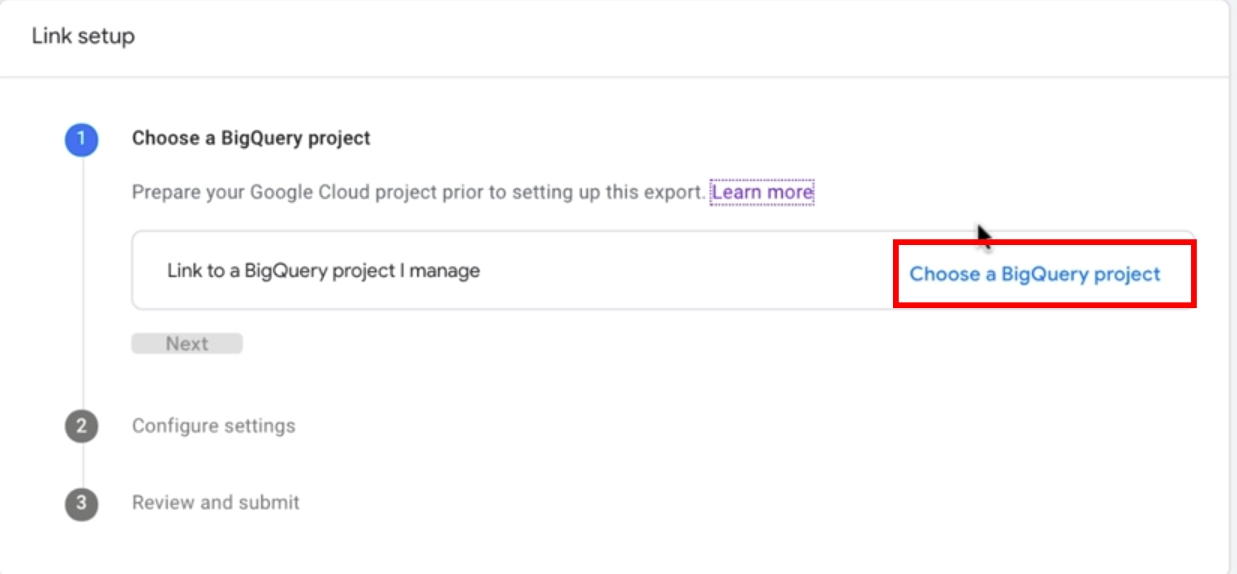
LInking to BigQuery
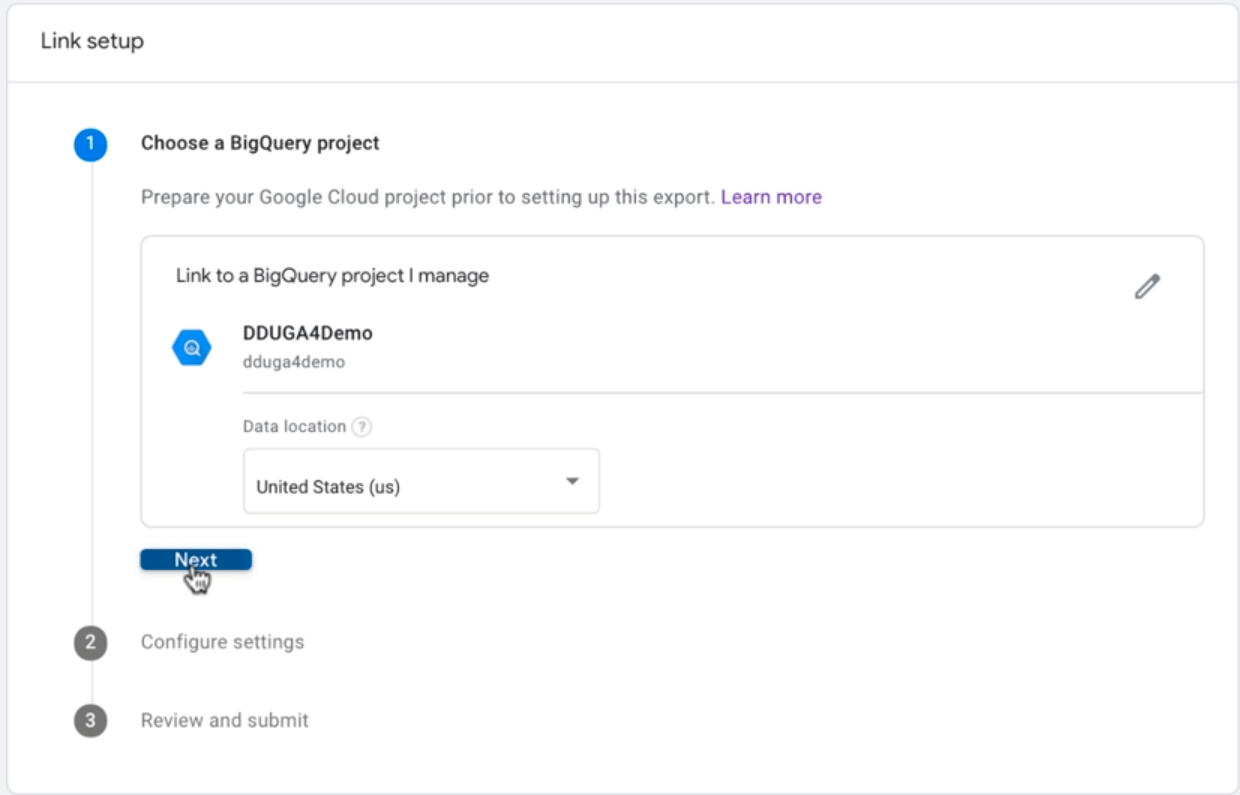
To do this, go back to the Link setup page on your Analytics account and click Choose a BigQuery project.
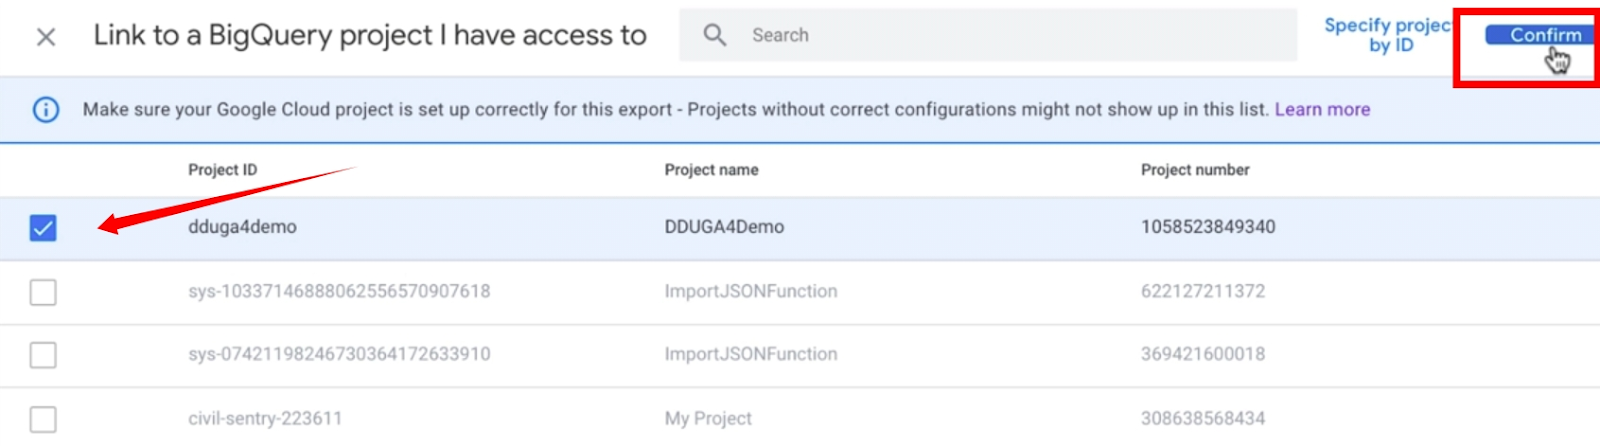
Select the project that you just created from the list. Then click Confirm.
In step one, select the data location.
In step two, select the data streams and the frequency. Note that, unless you have paid for a Google Cloud account, you will only be able to select Daily frequency. If you decide you want to check data more than once a day, you can add streaming at a later date.
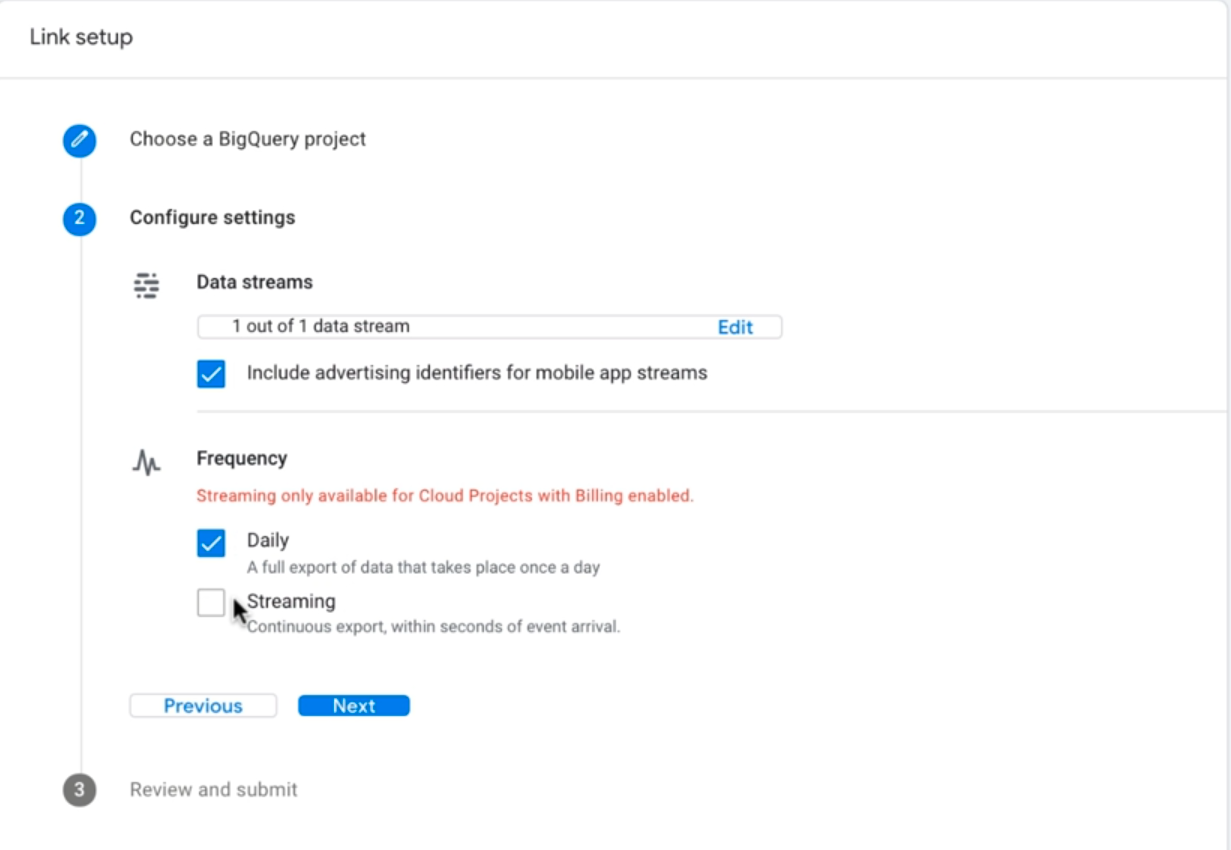
Click Next and go to step three where you can review and submit your data.
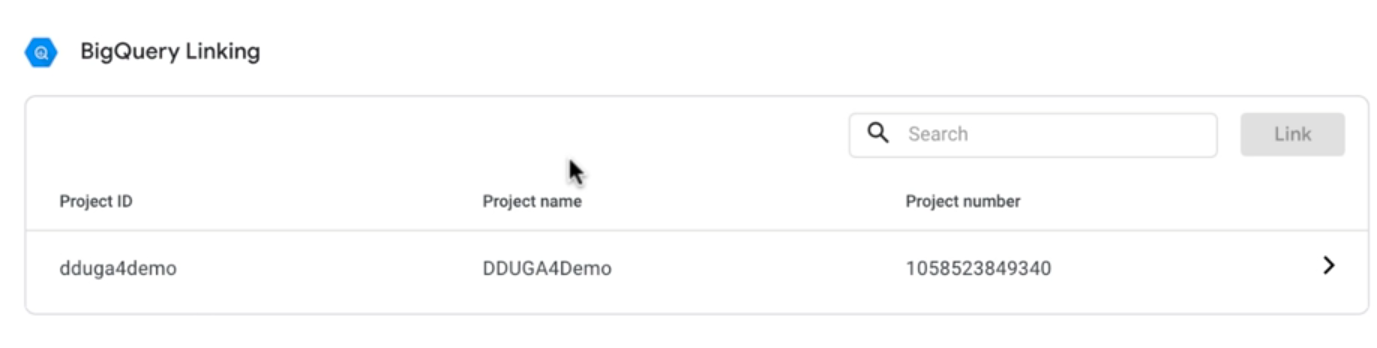
You will now be able to see your account in the BigQuery Linking page.
Setting up an account in BigQuery
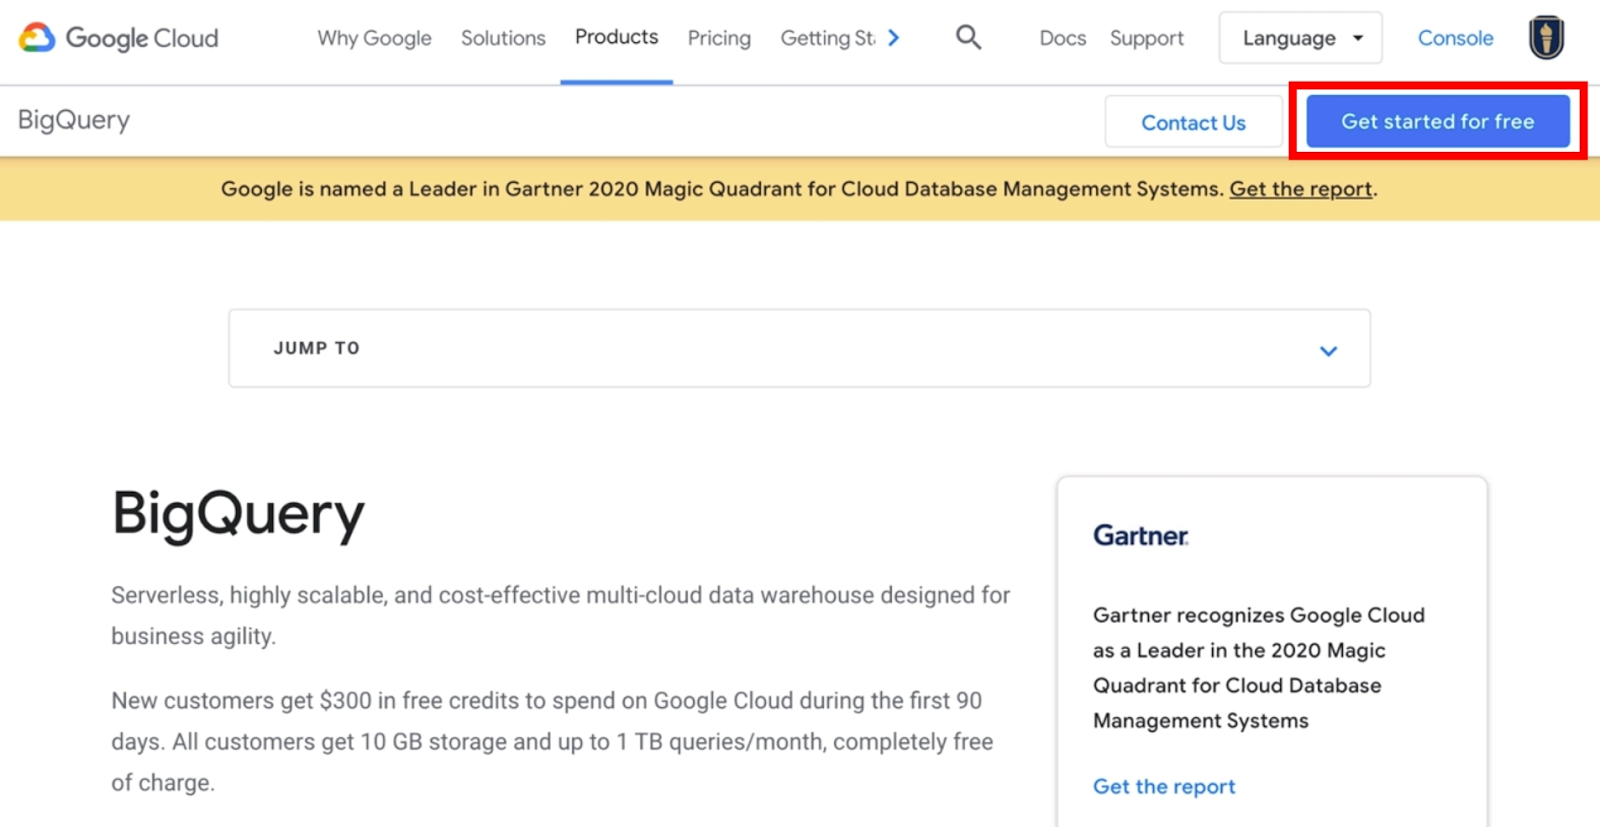
Now, go to Big Query and sign up for a free trial.
You will need to put in your credit card details but you get $300 free credit to start, and this should last you for a while if you are not analyzing too much data.
In your BigQuery account, you will find your demo project which won’t have any data in it just yet.
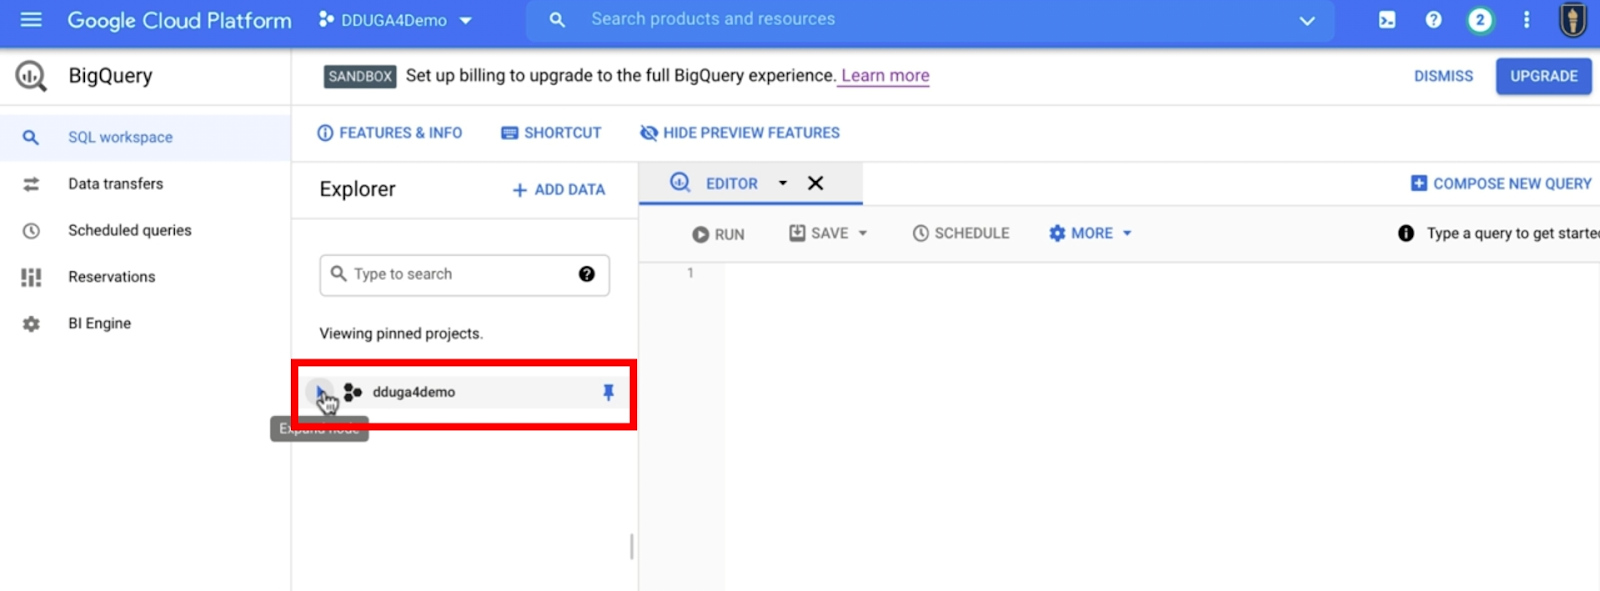
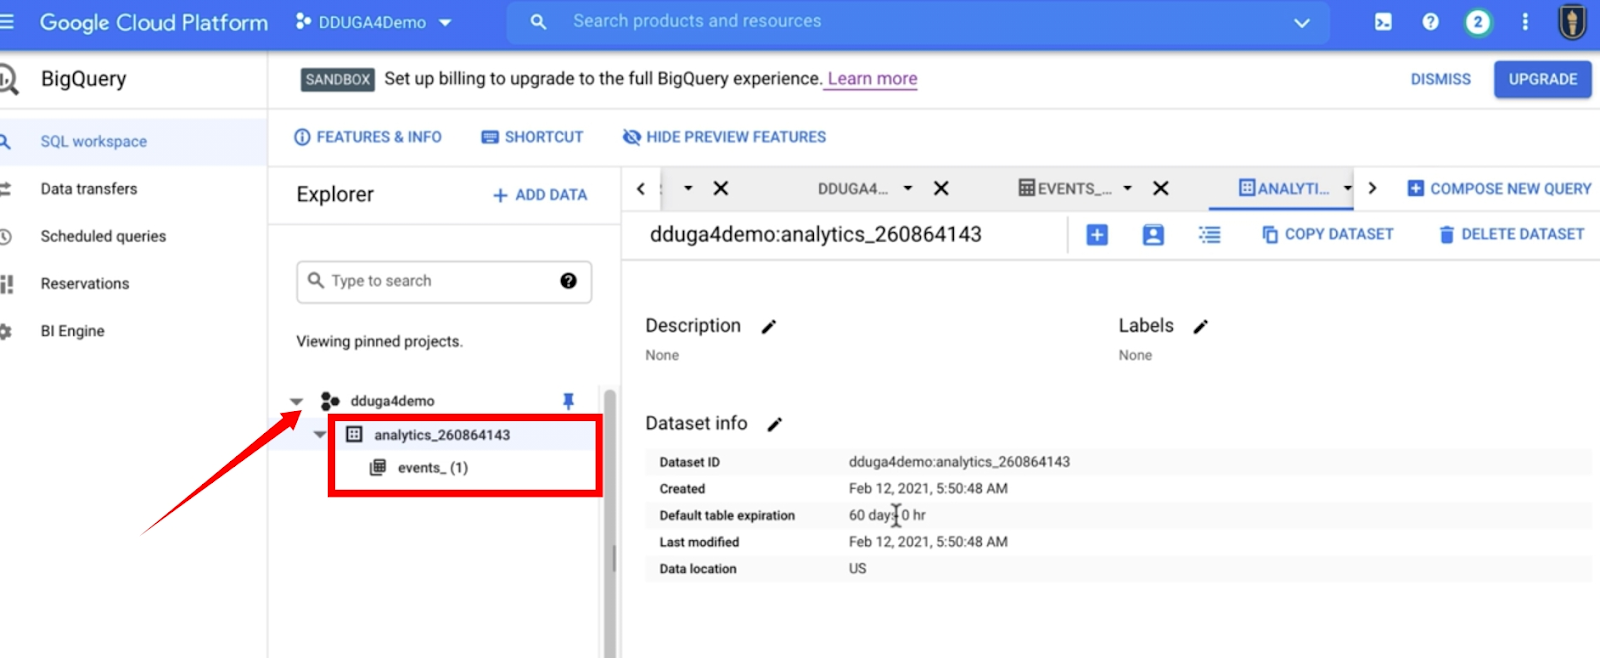
Accessing your data in BigQuery
Once you have left your data to populate, come back to your BigQuery account to check the data. Next to your project, click on the arrow to expand. In the expanded menu, you will see there is analytics data and events data.
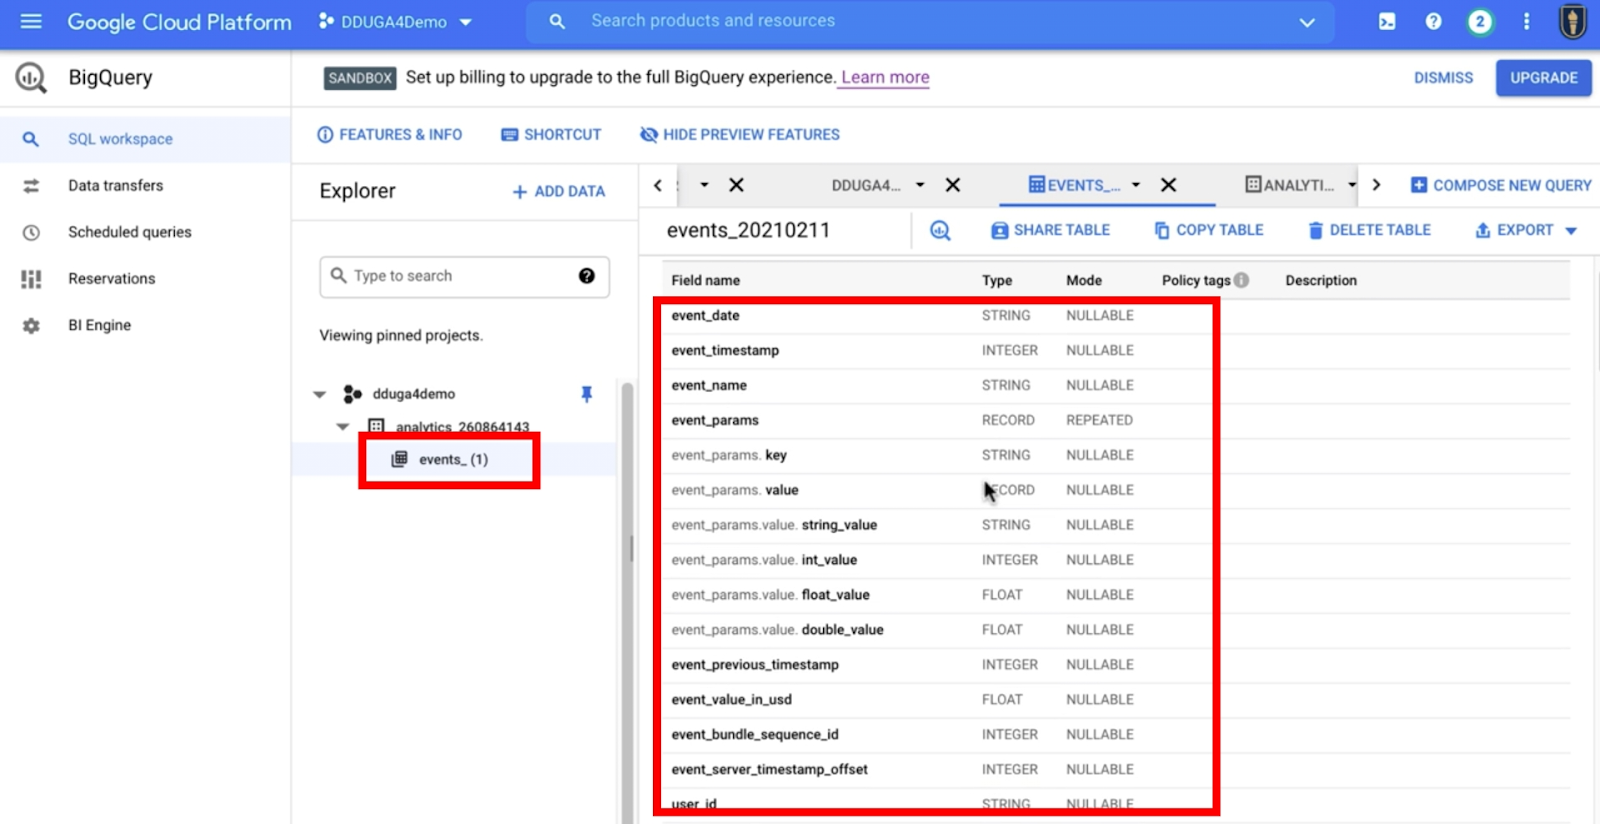
Click events to see all the data coming through for all your events, including the ones from enhanced measurement and any custom events you have set up.
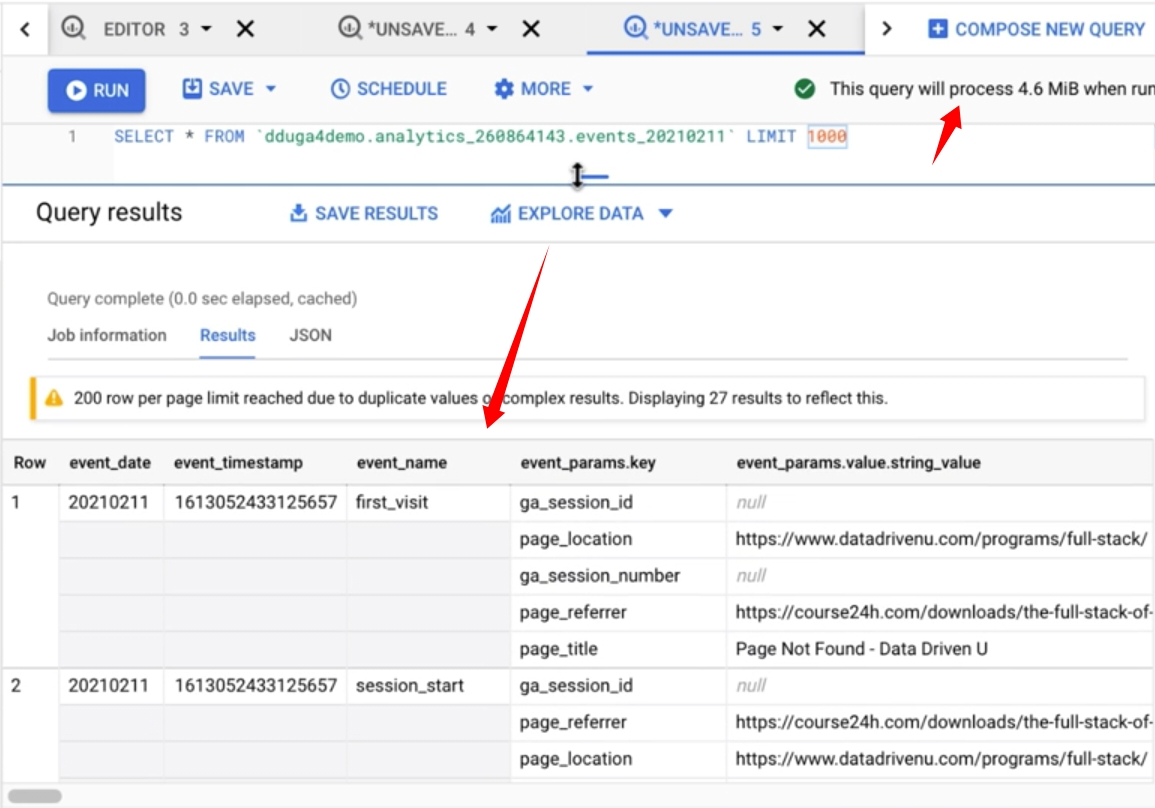
If you want to see data for these events, you can enter a very simple query. Click the Query Events icon at the top of the data table.
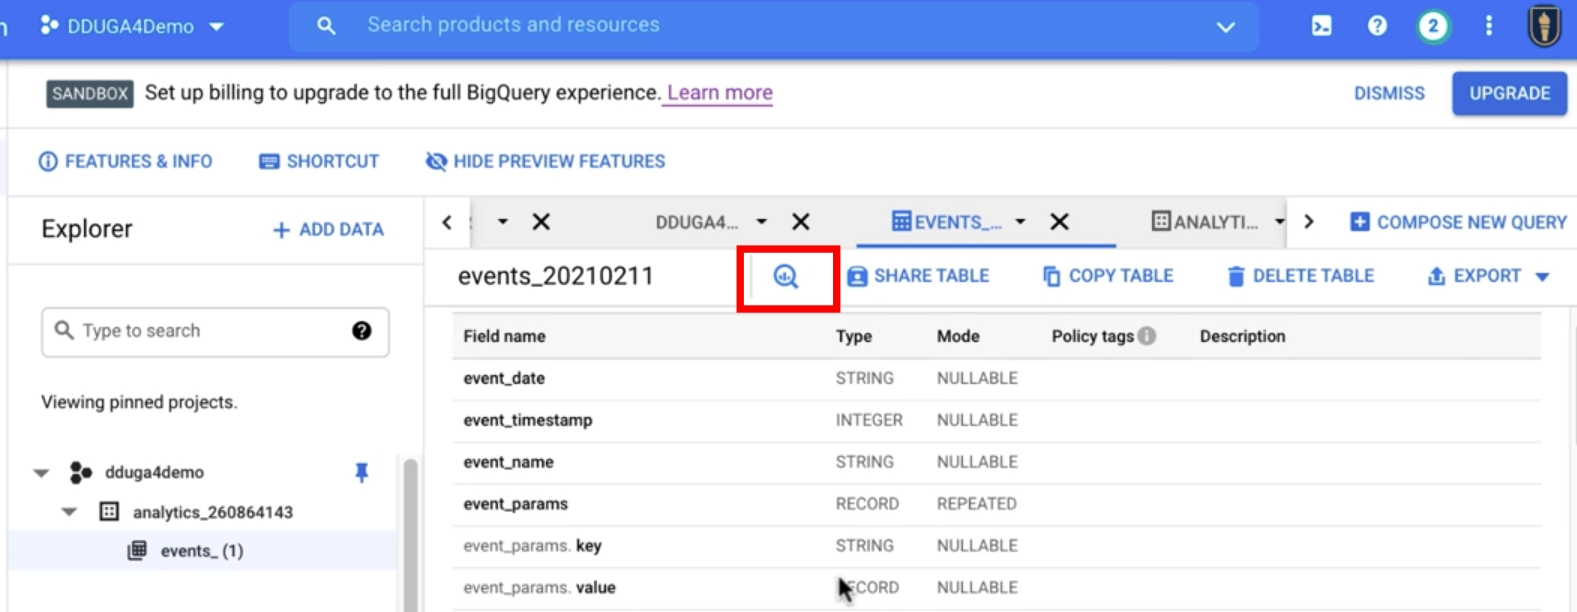
Next, add an * between SELECT and FROM in the query then click Run.

The query results will show underneath with all the details about the event.
A message at the top right indicates the size of your query. This is useful to keep an eye on if you are processing a lot of data as this is how your account will be charged. If you are starting with the free account and $300 of credit, this shouldn’t bother you for a while.
Useful Links
Key Takeaways
- Connecting to BigQuery now is required to get the data flowing
- You can access BigQuery inexpensively or even free in the sandbox
- The data stream is only available for a paid version (it’s not really expensive)
- You’ll need patience as you walk through the process
- Hopefully, our instructions will help you get this right from the first try

